
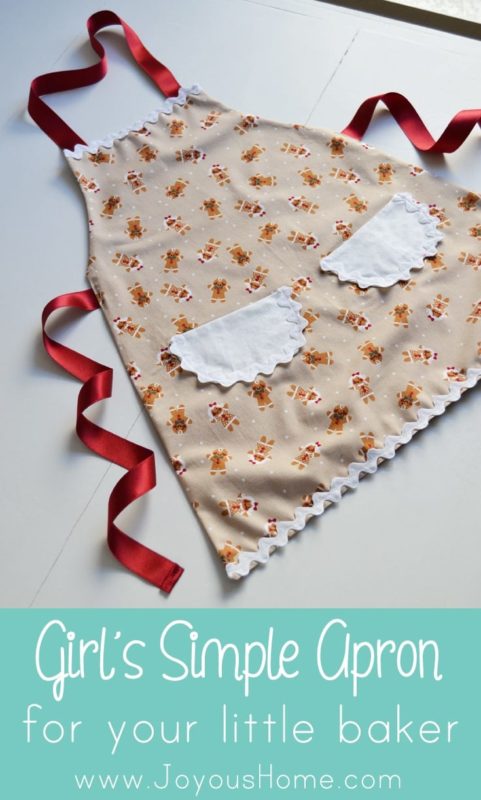
Make a Simple Girl’s Apron For Your Little Baker
“Is it really simple?” It was, and my little girls are happy with them! Christmas cookie time is here, and I have two very eager little cookie bakers who are so ready to bake this year! Even though this Christmas season is going by so fast already with travel and a Christmas to-do list stacking up. Let’s make a simple girl’s apron for your little baker!
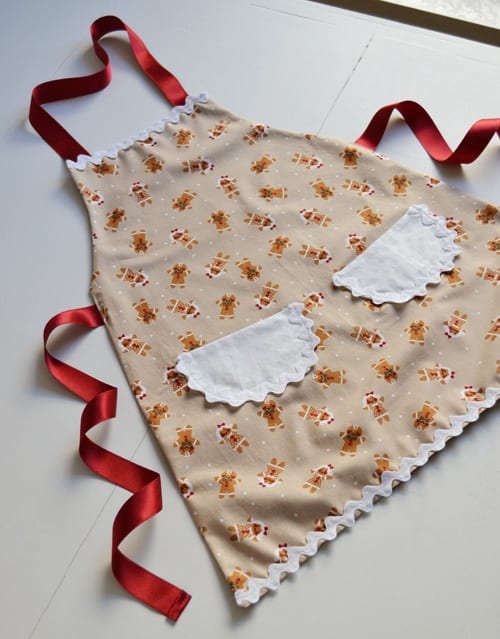
Let me encourage you that you can sneak them in also because these are indeed easy. I won’t call it the one-hour apron, but I only spent about 1 1/2 hours or so total on each one. In addition, I’ll show you how to draw your own apron pattern the exact size your little girl needs. It takes about 5 minutes without the need to cut different-sized patterns.
Simple Girl’s Apron Tutorial
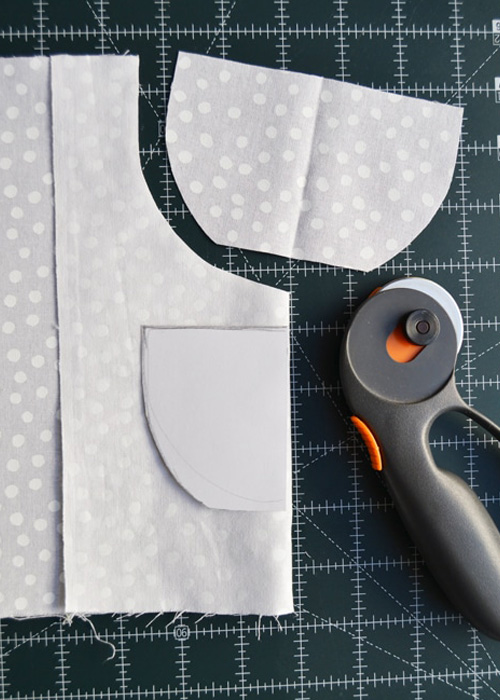
To make your pattern, and depending on the child’s age, you’ll need one big piece of paper, art paper is perfect. My sheet was 18″ x 12″. If you need bigger, you can tape two pieces of paper together. Grab one of your daughter’s shirts/t-shirts and lay it out on the paper, aligned with the edge as shown:
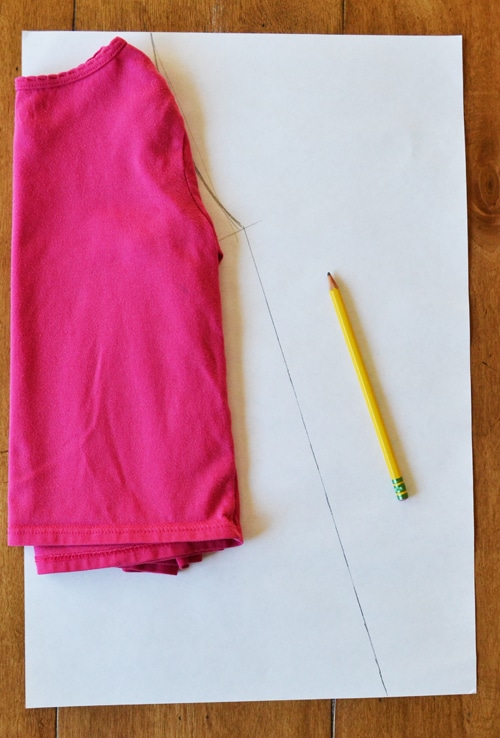
Draw a little curve where the arm sits. Don’t sweat making it perfect, just a little curve, the arm on the shirt will guide you. Use a ruler to draw an angled straight line, angled out a bit to create a flared A-line bottom for the apron (flare it out or make it as straight as you like!) Draw the line a few inches past the bottom of the shirt. The longer the line, the longer the apron. Cut out your pattern.
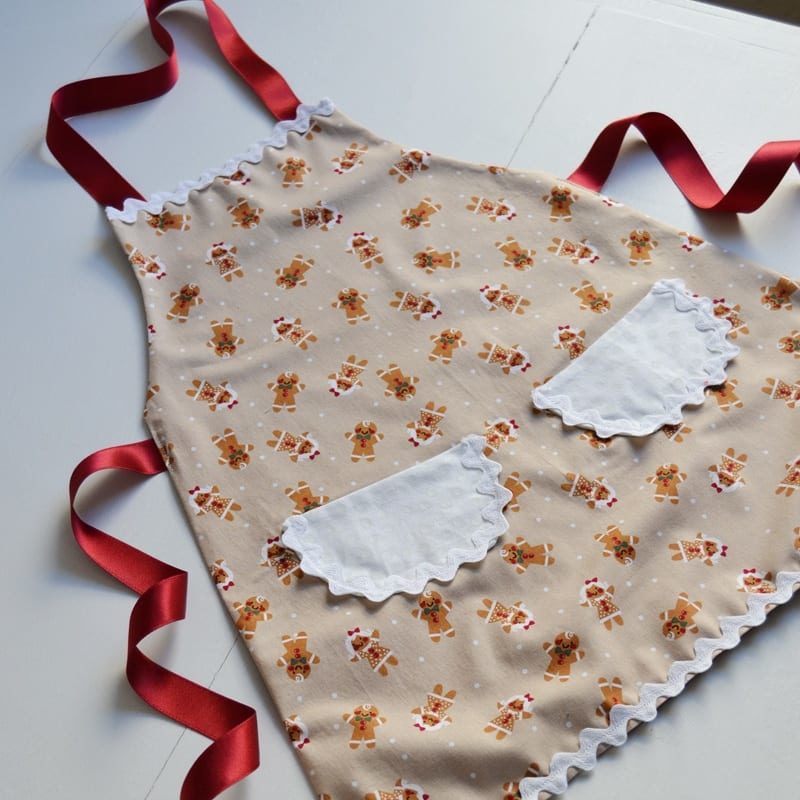
Note on this tutorial: The pockets are little add-ons I thought were pretty, but they are optional. If you want to make the apron even faster, go for it and skip them! The pocket is a little tea cup like the shape I drew. You can make a pocket any shape you like, the steps I give will still apply to whatever you draw.
Simple Apron Supply List
- 1 yd. apron fabric
- 1 yd. liner fabric
- 1/4 yd. pocket fabric (optional)
- 1 1/2 yd. ricrac (optional)
- 2 1/2 yd. 1″ ribbon
- Cotton threads to match each fabric and ricrac
- General sewing supplies are listed in the card below
How to make the simple apron:
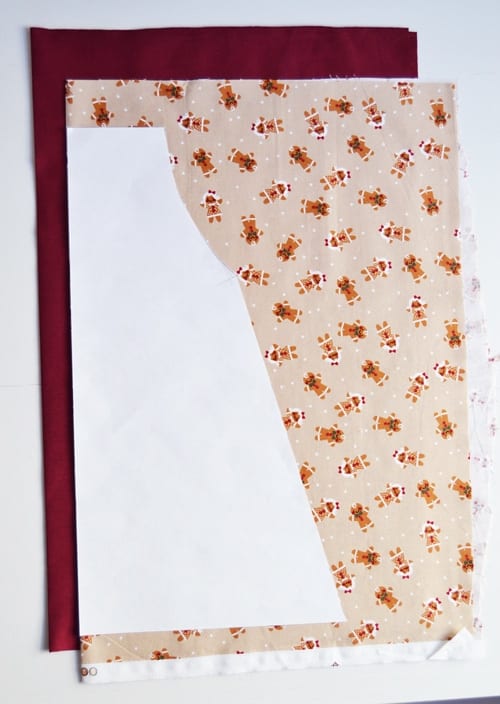
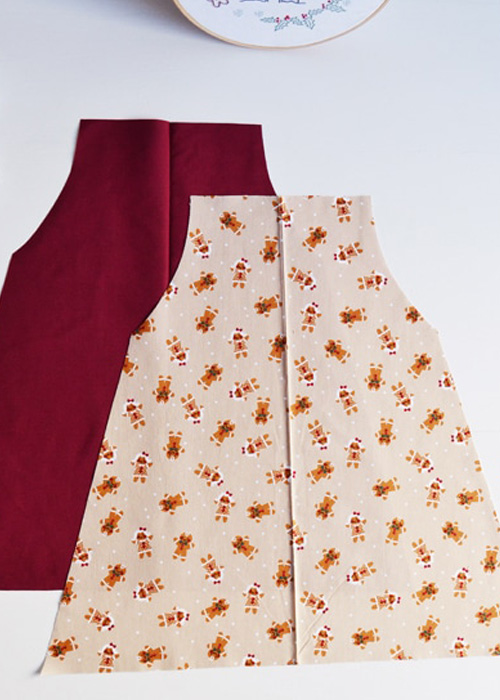
Iron your fabric before cutting. Align the pattern on the fold of the fabric. Cut one piece each from the apron and liner fabric.
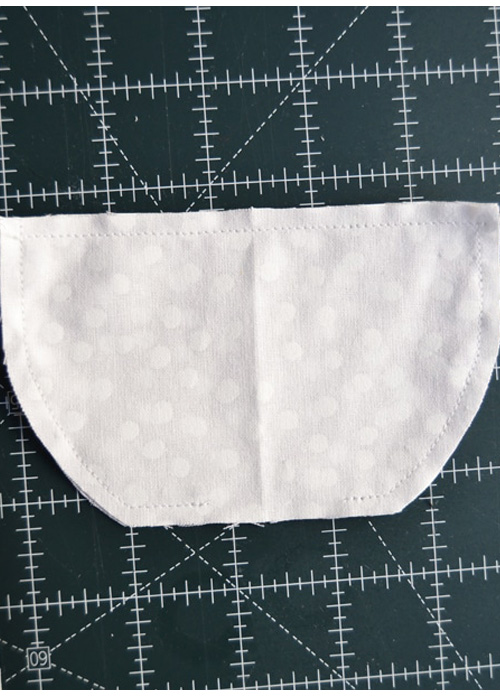
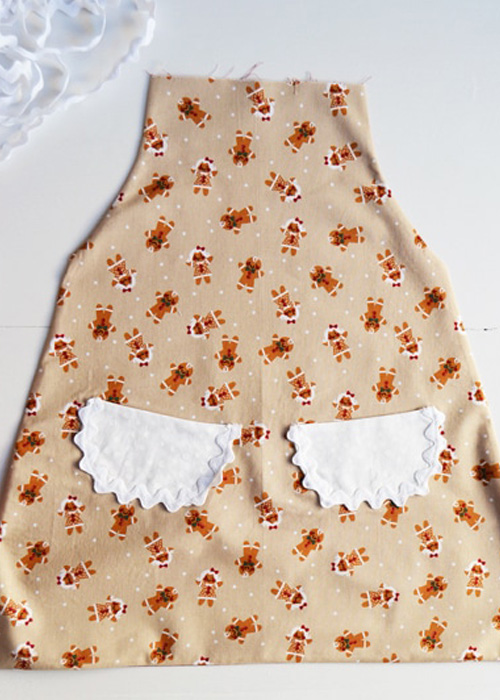
Optional pocket: I drew half of a tea-cup-shaped pocket and cut out four pieces on the fold of the fabric. Pin the two pairs, right sides together. Sew all the way around with a 1/4″ seam allowance, leaving a small opening on the bottom. Turn the right side out, and push the corners all the way out. Iron flat, tucking in the bottom opening so that’s closed. You will stitch the opening closed when you sew the pocket to the apron.
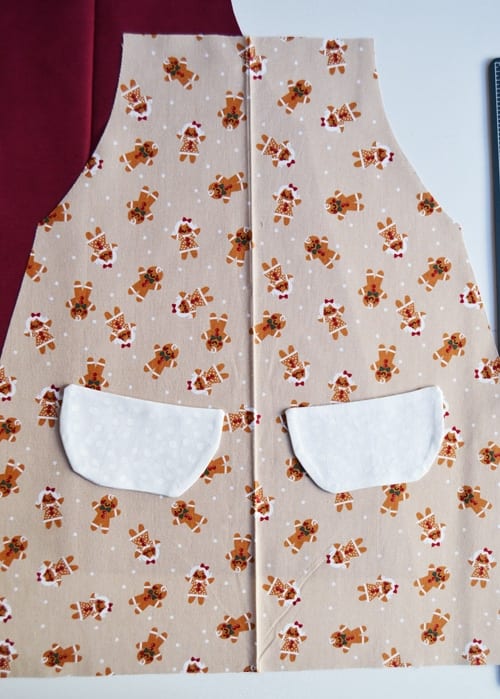
Lay your pockets out on your apron front, align them as you like, and then pin them in place. Sew around the outside edge of the pocket. Use matching thread to stitch the ricrac on the edge of the pocket if desired. Stitch down the center of the ricrac. Trim the ends of the ricrac clean and flush with the edge of the top of the pocket.

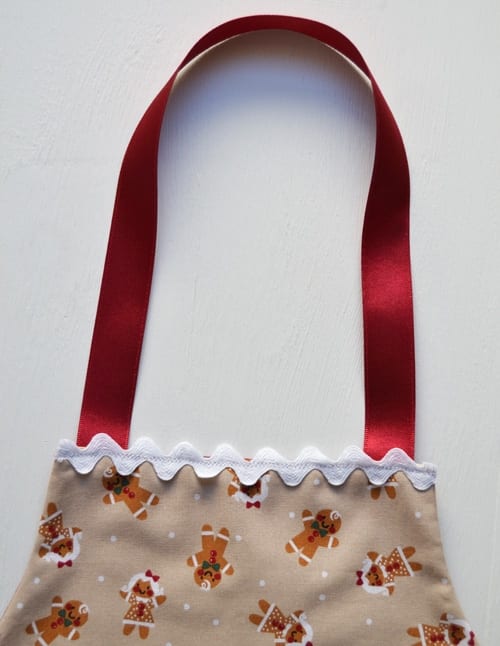
TOP: Fold the top in 1/4″ and press flat. Cut an 18″ piece of ribbon for the neck (or the size needed). Insert the ribbon in the top opening and pin in place. Sew around the top 1/8″ from the edge. Sew ricrac to the top, using the same steps as the bottom.
Simple Girl's Apron
Make an adorable little Christmas apron for your little baker!
Materials
- 1 yd. apron fabric
- 1 yd. liner fabric
- 1/4 yd. pocket fabric (optional)
- 1 1/2 yd. ricrac (optional)
- 2 1/2 yd. 1" ribbon
- Cotton threads to match each fabric and ricrac
Tools
- General sewing supplies
- sewing machine
- scissors
- pins
- iron
- chalk/fabric marker
Instructions
- To make your pattern, and depending on the child's age, you'll need one big piece of paper, art paper is perfect. My sheet was 18" x 12". If you need bigger, you can tape two pieces of paper together. Grab one of your daughter's shirts/t-shirts and lay it out on the paper, aligned with the edge as shown in the post.
- Draw a little curve where the arm sits. Don't sweat making it perfect, just a little curve, the arm on the shirt will guide you. Use a ruler to draw an angled straight line, angled out a bit to create a flared A-line bottom for the apron (flare it out or make it as straight as you like!) Draw the line a few inches past the bottom of the shirt. The longer the line, the longer the apron. Cut out your pattern.
- Iron your fabric before cutting. Align the pattern on the fold of the fabric. Cut one piece each from the apron and liner fabric.
- Optional pocket: I drew half of a tea-cup-shaped pocket and cut out four pieces on the fold of the fabric. Pin the two pairs, right sides together. Sew all the way around with a 1/4" seam allowance, leaving a small opening on the bottom. Turn the right side out, and push the corners all the way out. Iron flat, tucking in the bottom opening so that's closed. You will stitch the opening closed when you sew the pocket to the apron.
- Lay your pockets out on your apron front, align them as you like, and then pin them in place. Sew around the outside edge of the pocket. Use matching thread to stitch the ricrac on the edge of the pocket if desired. Stitch down the center of the ricrac. Trim the ends of the ricrac clean and flush with the edge of the top of the pocket.
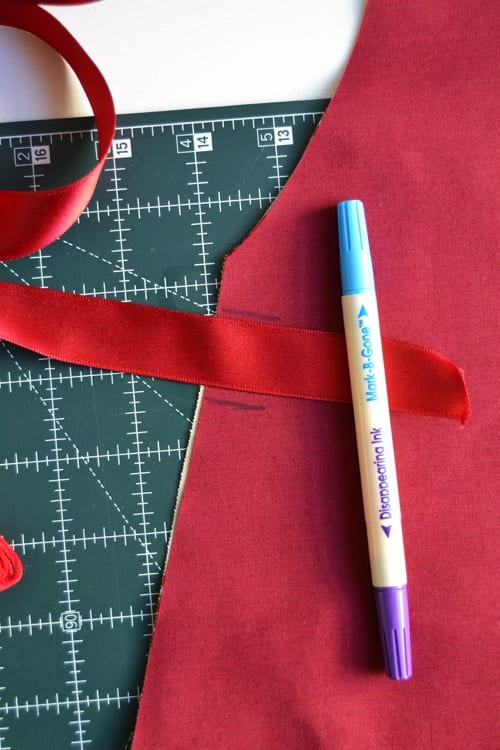
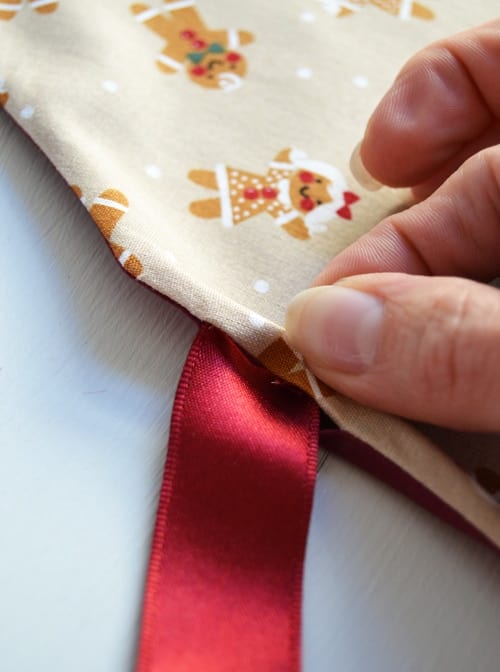
- Use a fabric marker/chalk to mark your opening for both of the ribbon ties starting about 3/4" beneath the arm. Lay your ribbon on the mark as shown to mark the second line for the proper width of the opening, about a 1 1/4" opening for 1" ribbon.
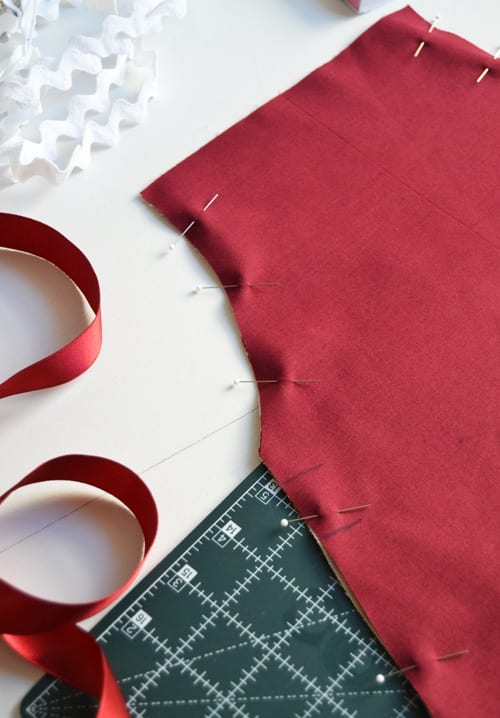
- Lay your apron front and liner right sides together, align all of the edges, and pin them together. Sew all the way around the apron, starting at the top (you are going to leave the top of the apron open), with a 1/4" seam allowance. Remember not to sew over the tie openings!
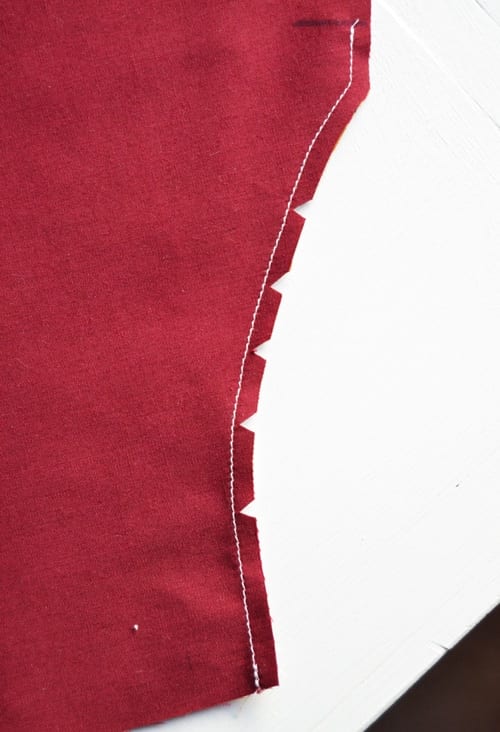
- After you finish sewing around the apron, use a pair of scissors to notch under the open as I did below. This will remove buckling on the seam under the arm when you turn it right side out.
- Turn the apron right out, and poke out all of the seams points/corners evenly. Iron flat, tucking in the seam on the tie openings and pressing to make an even edge.
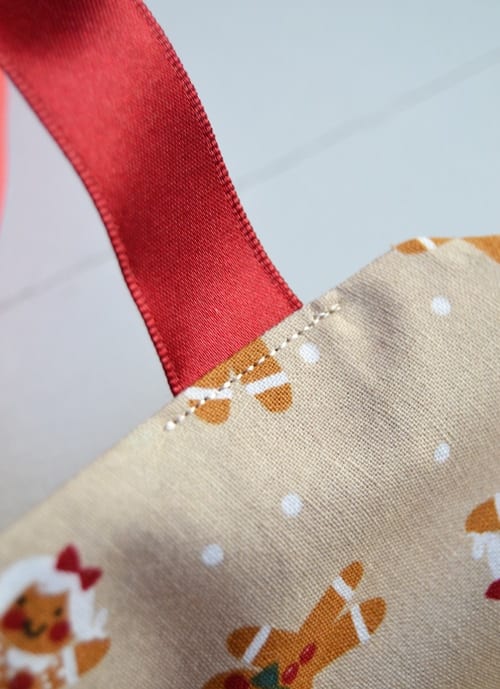
- The length of the ribbon ties depends on the size of your child. I cut mine for my 3T and 5T daughter about the same, 22". Insert each ribbon tie in its opening and pin in place.
- Sew the opening closed with matching thread in the main spool and bobbin thread for the liner. Trim a clean angled edge on the end of each ribbon tie.
- BOTTOM: Cut a piece of ricrac a little bit longer than the bottom of the apron. Line the ricrac along the bottom. Using a matching thread, stitch a straight line through the center of the ricrac. Trim the ends of the ricrac even with the apron edge.
- TOP: Fold the top in 1/4" and press flat. Cut an 18" piece of ribbon for the neck (or the size needed). Insert the ribbon in the top opening and pin in place. Sew around the top 1/8" from the edge. Sew ricrac to the top, using the same steps as the bottom.
Notes
To make your pattern, and depending on the child's age, you'll need one big piece of paper, art paper is perfect. My sheet was 18" x 12". If you need bigger, you can tape two pieces of paper together. Grab one of your daughter's shirts/t-shirts and lay it out on the paper, aligned with the edge as shown.
Draw a little curve where the arm sits. Don't sweat making it perfect, just a little curve, the arm on the shirt will guide you. Use a ruler to draw an angled straight line, angled out a bit to create a flared A-line bottom for the apron (flare it out or make it as straight as you like!) Draw the line a few inches past the bottom of the shirt. The longer the line, the longer the apron. Cut out your pattern.
Your apron is ready for Christmas baking! Have fun! Jessica
Pin me!
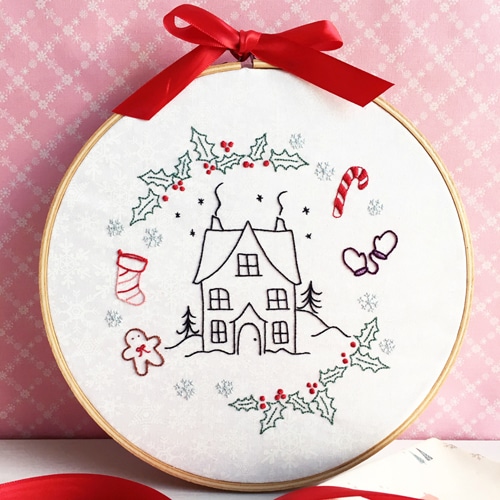
Christmas Stitching: Christmas Cottage Pattern by Jessica
Child of God, Wife to Josh, Mommy to my four sweet children. Thankful for busy days filled with homeschooling, homemaking and loving my little family! And sneaking in sewing and pattern design whenever I can 🙂