
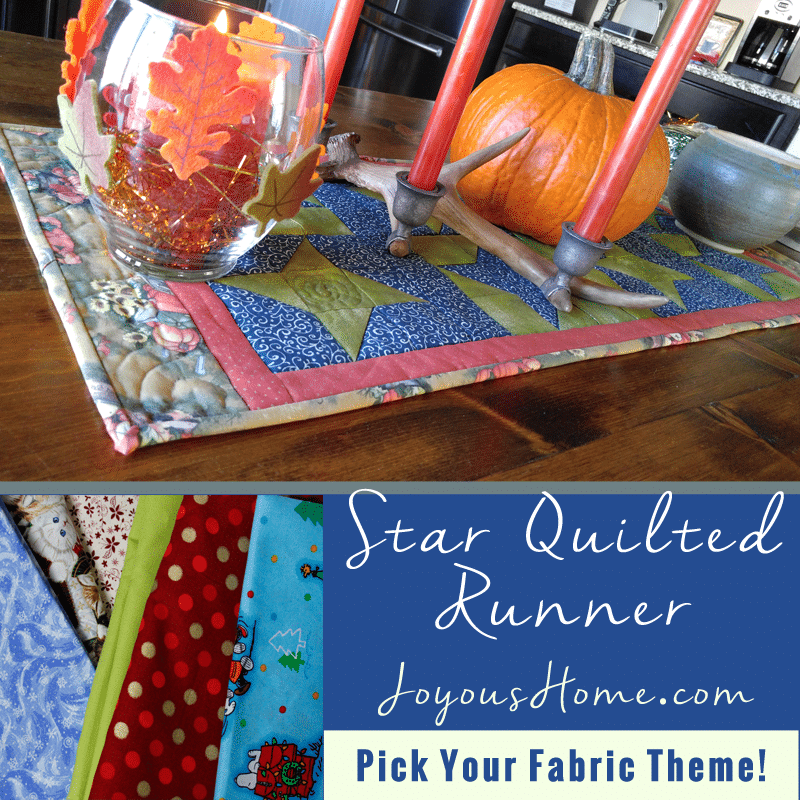
Make an Easy Star Quilt Table Runner
Easy Star Quilt Table Runner
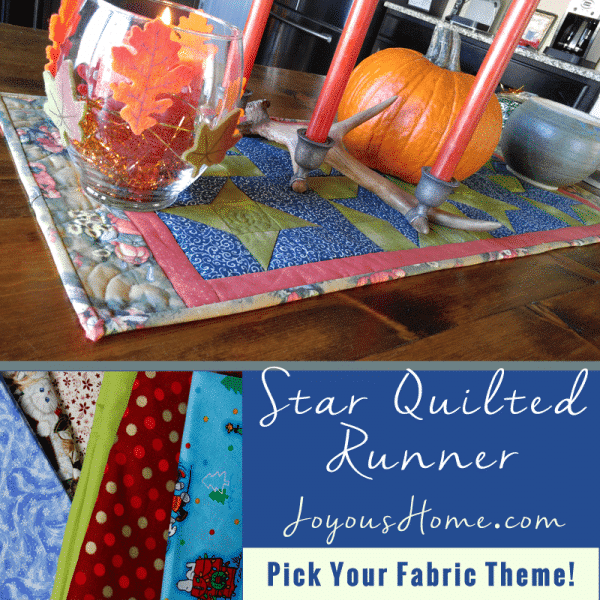
An easy table runner for your fall decor!
Materials
- 3/4 yd. each of two contrasting fabrics (for 8 stars) (6" blocks) - Also used for the in-between borders.
- 1/2 yd. inside border
- 1/2 yd. outside border
- 3/4 yd. backing
- 3/4 yd. batting - Warm and Natural]
Tools
- Cutting mat, rotary cutter, clear quilting ruler
- Straight pins (I use glass headed pins)
- Quilting safety pins (Kwik Clip optional)
- Scissors, sewing machine, iron
Instructions
Prepare fabric by washing and squaring off. Squaring off is simply putting the selvages together, and using a cutting mat, taking off the uneven cut in preparation to cut strips.
Cutting Strips:
1. Cut 2 7/8" strips from each color for the stars. You'll need 8 squares of each color.
2. Cut each 2 7/8 square diagonally and set aside. If you are really good at rotary cutting, you can cut two at a time. This is will give you 16 triangles of each color.
3. Cut 2 1/2" strips from each color. You'll need 20, 2 1/2" squares of each star color. These make up the middle and corner blocks of each star.
You'll be making 4 of each combination of fabrics. For each star, you'll need 4 triangles of each color sewn together.
Layout:
You'll be making 4 of each combination of fabrics. For each star, you'll need 4 triangles of each color sewn together.
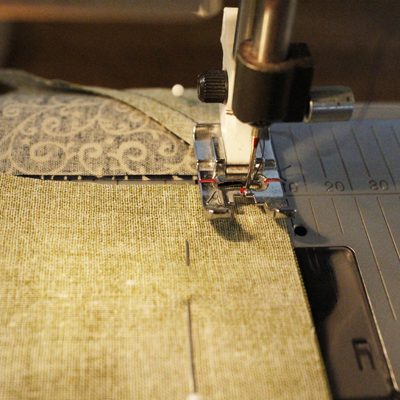
1. Chain sew 16 sets of triangle combinations, making 32 blocks. The corner squares are your 2 1/2" squares.
2. For each star sew the first two blocks in each row, press carefully open, and then add the 3rd block. Layout 8 blocks, 4 of each combination.
3. RST, row 1, lay block one on two PIN THE SIDE TO BE SEWN - repeat for rows two and three. Sew. Now, pin the 3rd block to each set, sew.
[If you are good at logically laying out blocks to put together, chain sew all the first two blocks in the 8 layouts at once. Then add the 3rd block.]
IRON: Row 1: Press the middle seams outward. Row 2: Press the middle seams inward. Row 3: Press the middle seams outward.
Sewing Star Rows:
Once the blocks are sewn into rows, sew the rows together.
Iron: Press the seam on the first two rows sewn together upward. Add the 3rd-row press the seam down.
Pin the first row to the second row in each block set. Make sure your pins are pointing toward the end to be sewn.
Some Tips: Do not to sew over a star point. You want to stay above the 'v'. (Pictures on site) Nest (align) and PIN the seams.
Make 8 blocks - Each should measure 6" when done.
Sew Stars Together:
You are using the same method of aligning the blocks, and pinning (RST). PIN the side you need to sew, align the seams.
Iron: Row 1, seam left. Row 2, seam right. Row 3, seam left. Row 4, seam right.
NOTE: Videos are available on the site to help with techniques.
Add the Borders
In-Between Borders: Cut 1 border strip 2" x 11 3/4" from one-star color, and 2 from the other star color. These are the in-between star row borders.
On the first set, RST, pin the border to the bottom. Sew. Sew the next row to the border. Repeat until the rows are complete.
Inner Border:
Probably the easiest way to add any outside border is to measure the width and length of the piece first. The inner border is 1 1/2" in width. Measure the top and the bottom. Use the smallest measurement for length. Cut the border strip. Pin RST, and sew the top and bottom borders in place. Press up. Repeat this process for the sides.
Outer Border:
Top and Bottom only. Use the process of measuring for length as above. The border width is 2 1/2" on mine, or pick a larger width if desired.
Layering the Quilt
Backing face-down - I normally tape the backing to a hard surface, you want it smooth and bubble-free as you pin, batting, then quilt top face-up. Pin the layers. Quilt as desired. Trim the excess from your quilt.
All that's left is to add the binding, and slip-stitch to the back.
I have videos that show how to finish your quilt. Have fun!
Notes
All seams are 1/4"
RST=Right Sides Together
Chain sewing means not to cut the thread between block sets, sew continuously when possible.
Pin the side you need to sew or pin with the point toward the end to sew. For rows, pin right at the seam so seams match.
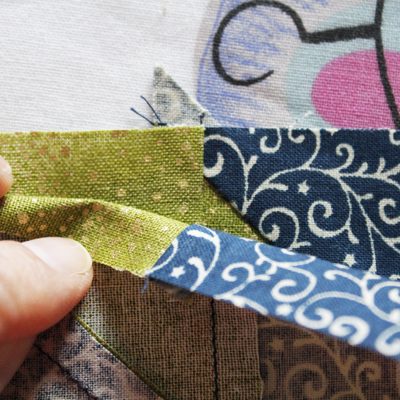
Trim the 'bunny ears', if you want to. I do sometimes.
Most of all, press your blocks lightly. Do not stretch. Make sure they are flat and open. If this isn't done right, consequently, you'll end up with a larger or smaller sewn block.
Make an Easy Star Quilt Table Runner
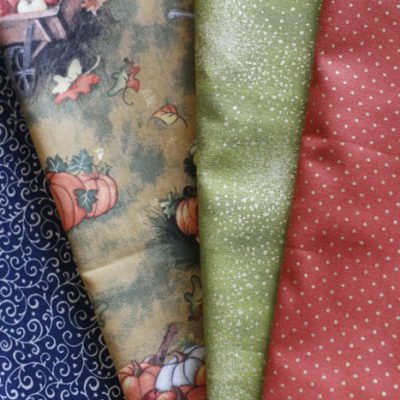
The Star Quilt Runner is a simple star piece that a beginner can try. Some quilting knowledge is helpful. The fabric theme is up to you! I made mine in the fall, so it has a fall theme. I’ll be happy to answer any questions in the comments!
[clickToTweet tweet=”A star block for any season! Try this easy runner from Joyous Home!” quote=”Try this star quilted runner for Fall or Christmas!” theme=”style1″]
Photo Guide for the Star Quilt Runner
Finished size is approx. 33" x 13.5"
This is a fairly easy quilt top. This photo tutorial is merely a guide if needed to see which step. The complete cutting steps are in the printed instructions. Some intermediate skills will help, but our core videos should help any beginner with unfamiliar techniques.
I usually buy more fabric than needed, therefore I have more if I make a mistake. You will have some left over fabric.
Prepare fabric by washing and squaring off. Squaring off is simply putting the selvages together, and using a cutting mat, taking off the uneven cut in preparation to cut strips.
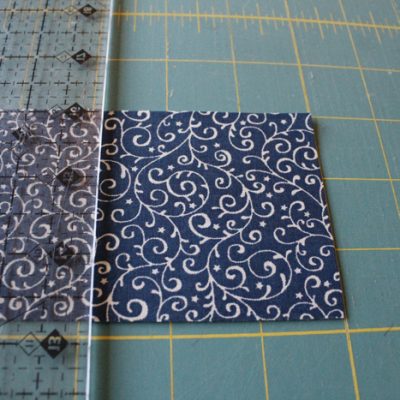
Cut 2 7/8″ strips from each color for the stars. You’ll need 8 squares of each color.
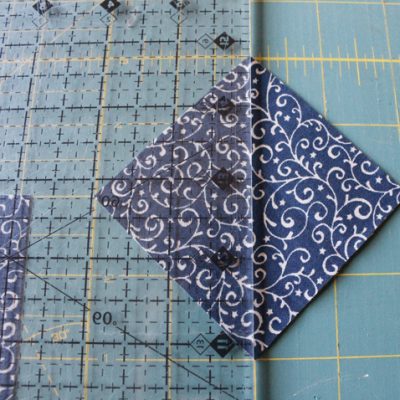
Cut each 2 7/8 square diagonally and set aside. If you are really good at rotary cutting, you can cut two at a time. This is will give you 16 triangles of each color. Cut your 2 1/2″ squares.
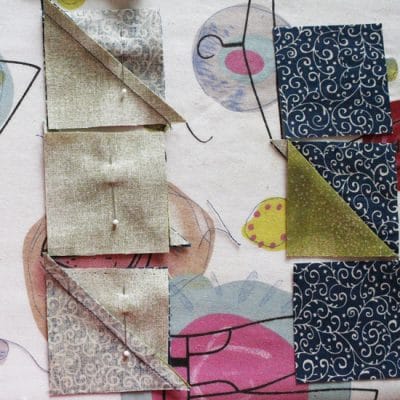
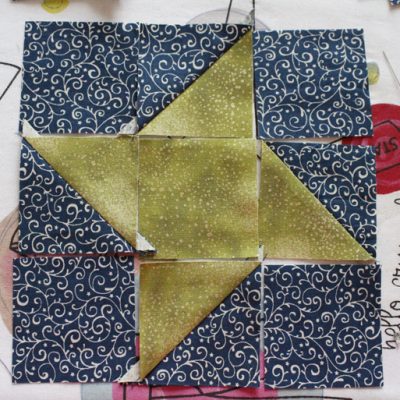
For each star I will sew the first two blocks in each row, press carefully open, and then add the 3rd block. Layout 8 blocks, 4 of each combination.
Sewing Star Blocks (Notes are in printed instructions)
Chain sew 16 sets of triangle combinations, making 32 blocks. The corner squares are your 2 1/2″ squares. (Cutting instructions in a printout)
If you are good at logically laying out blocks to put together, chain sew all the first two blocks in the 8 layouts at once. Then add the 3rd block. Ironing instructions are in the printout.
Sewing Rows in the Quilt Runner and Matching Seams

Once the blocks are sewn into rows, sew the rows together.
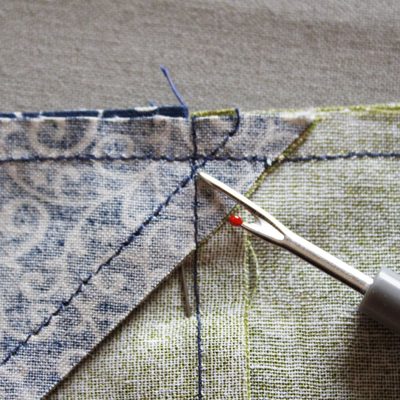
Do not to sew over a star point. You want to stay above the ‘v’.
Aligning your seams in the row is called ‘nesting seams’. Always pin them.
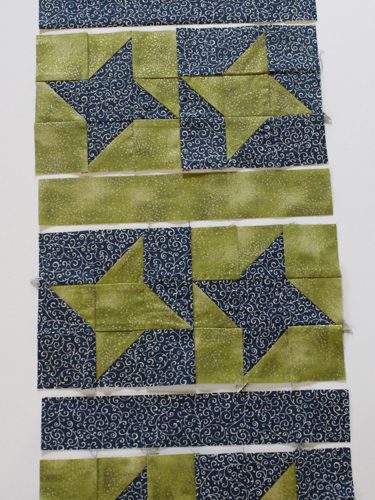
Now it’s time to sew your blocks together. This is a picture of all blocks, in addition to the in-between borders.
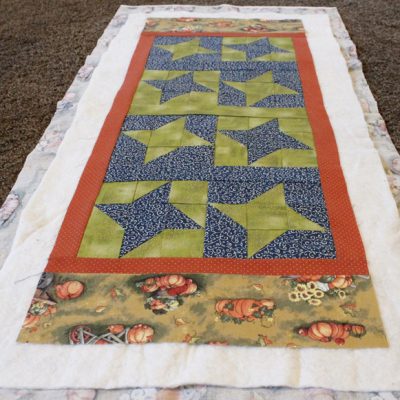
Sew the borders on, and layer your quilt.

Pin the layers with safety quilting pins.
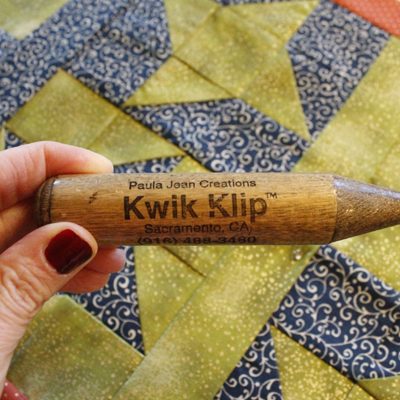
I’m a fan of tools that work. This handy little gadget will open and close a safety pin in a jiffy.
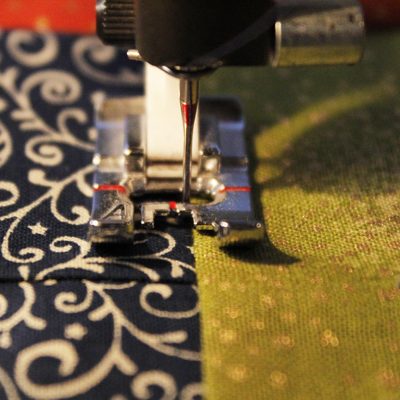
I used a basic ‘stitch in the ditch’. See how to use free motion or stippling on a quilt HERE.
Tip: A Walking Foot helps to pull quilted layers evenly under the needle. If you quilt a lot, it’s a good investment.
We have several videos that will help you on our core video page, chain stitching, how to make binding, stitch in the ditch, stippling, quilting mistakes and more. Scroll all the way to the bottom, the videos are there. I hope you find these helpful!
Have Fun!
More Videos:
Applying Binding
How to Slip Stitch Binding the Right Way
Feel free to ask questions in the comments!
Happy Quilting, Theresa