
How to Sew a Child’s Dress Collar with Piping
I loved to sew little dresses for my girls when they were younger. In this tutorial, I’m going to show you how to make a child’s dress collar with piping, commonly known as a Peter Pan collar. The added piping makes an adorable addition to the dress. This tutorial shows how to sew a collar with piping using your dress collar pattern.
Add Piping to a Collar
Until I started learning more about heirloom sewing, I didn’t know many tricks about tackling things like dress collars. I can’t say this is a trick, but it was such a good way to get the piping perfect on the collar. It’s almost impossible to get it wrong. Unless you trace two left collars like I did at first!
What to Cut and How to Sew Your Peter Pan Collar Pattern
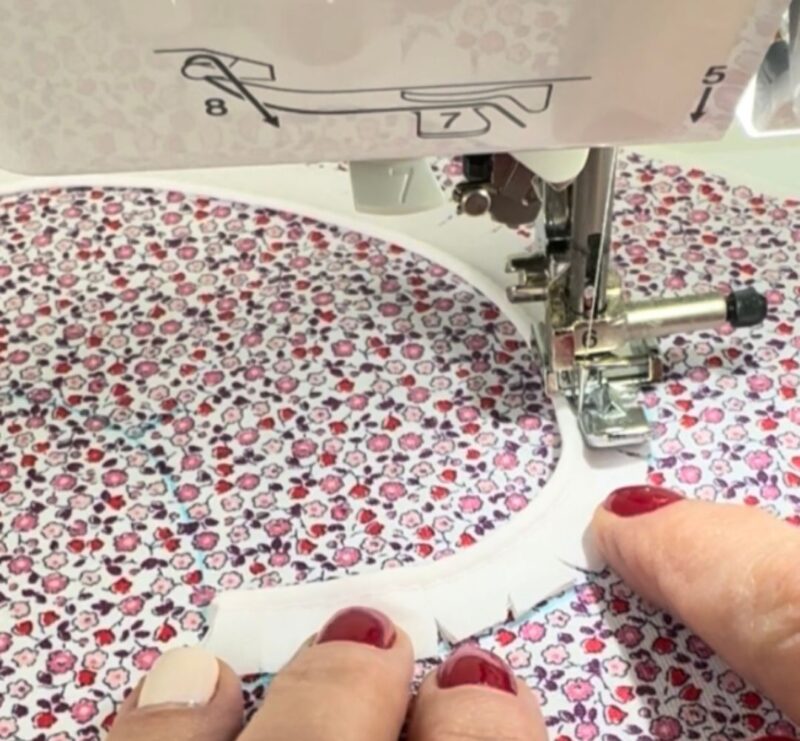
You’ll need an outer main fabric and a lining fabric. Cut a 9″ x 14″ block from each fabric. I used colorful cotton, and Batiste for the lining. Use a zipper foot with a stitch length of 3.0 to sew.
Note: Additionally, lightweight fusible interfacing or bastiste can be added as an ‘inner lining’ to the main fabric to keep the piping color from shadowing through the front. Fuse to the main collar fabric and treat them as one going forward.
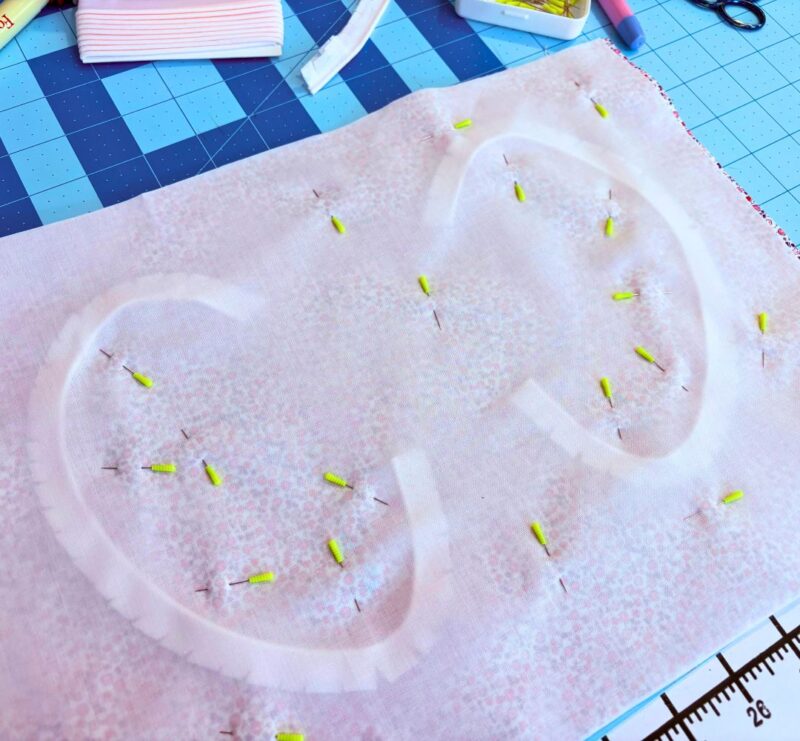
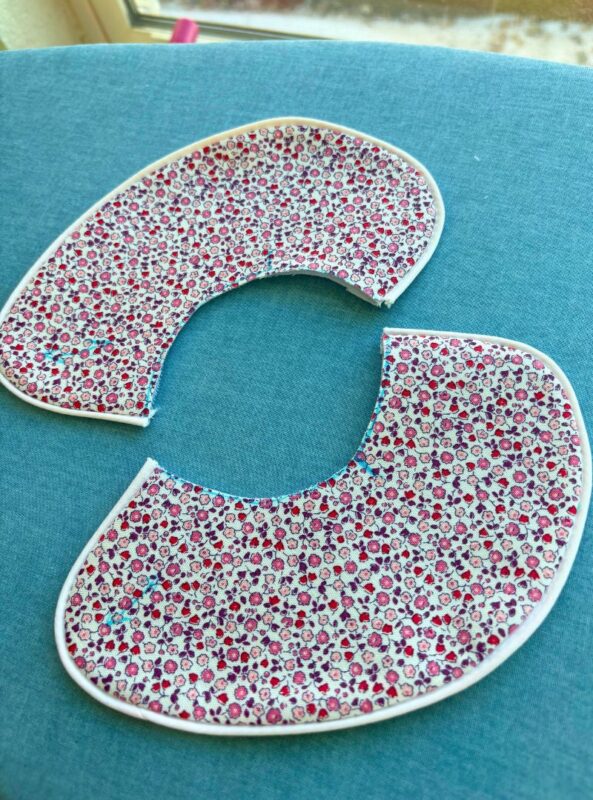
From your pattern, trace a right and left side collar on the right side of your main fabric block, using a washable marker. Make sure you can see the lines on both sides of the fabric, use a light box if needed.
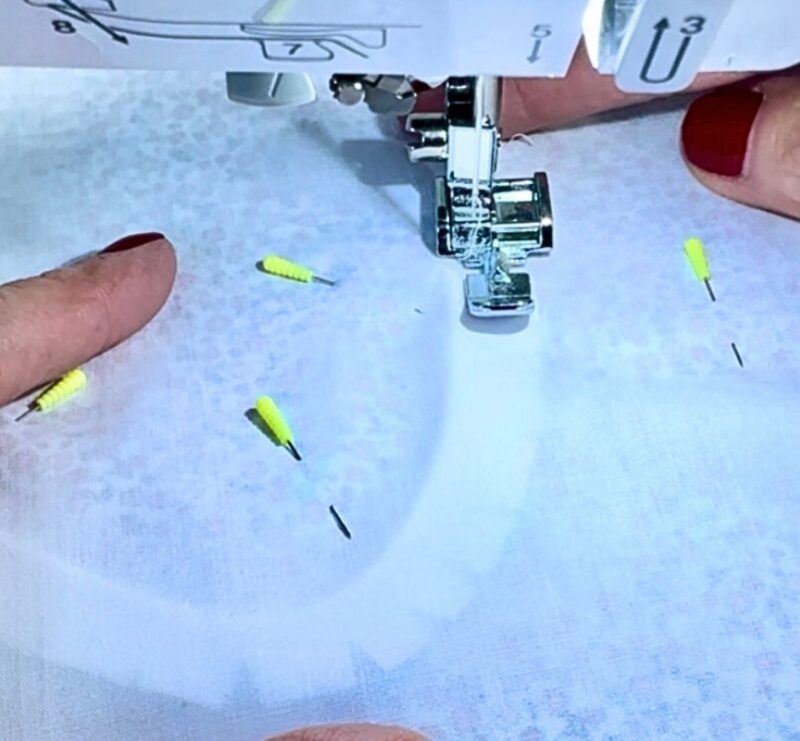
In my collar pattern, the seam allowance is added. Clip and glue the piping edge seam allowance to the outer edge of the traced collar, do not include the neckline.
Stitch the piping on both collars to the fabric. I have a quick video you can also watch.

Video on How to Sew a Child’s Dress Collar with Piping
What is a Zipper Foot?
A zipper foot is a sewing machine presser foot designed specifically for sewing close to the edge of zippers, piping, or bulky seams.
The zipper foot has a narrow shape that allows the needle to get very close to the edge of whatever you’re stitching. This makes it an excellent tool for sewing piping.
Move your needle either to the right or the left of the foot to sew on either side.

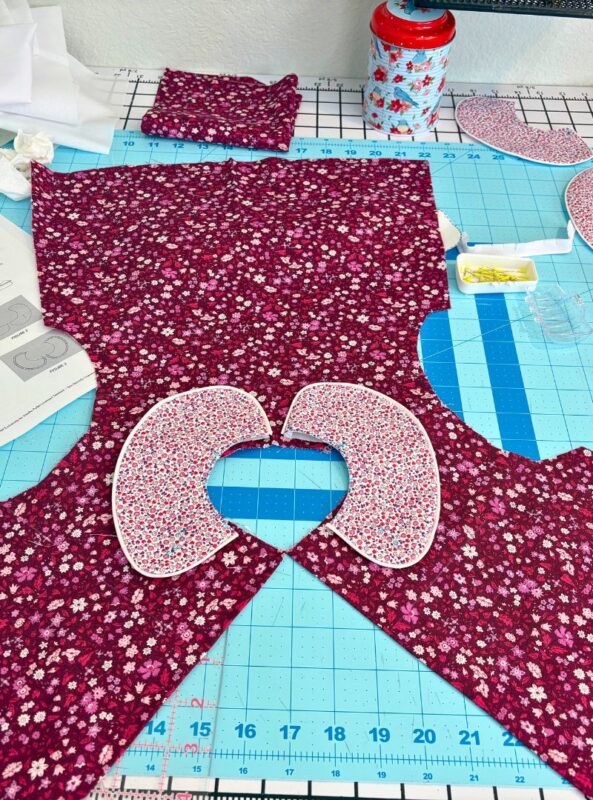
Place your outer lining fabric block right side down, on top of the main fabric block with the piping. Smooth and pin in place.
On top of the lining, stitch the lining to the piping, following close to the previous stitching, using the zipper foot.
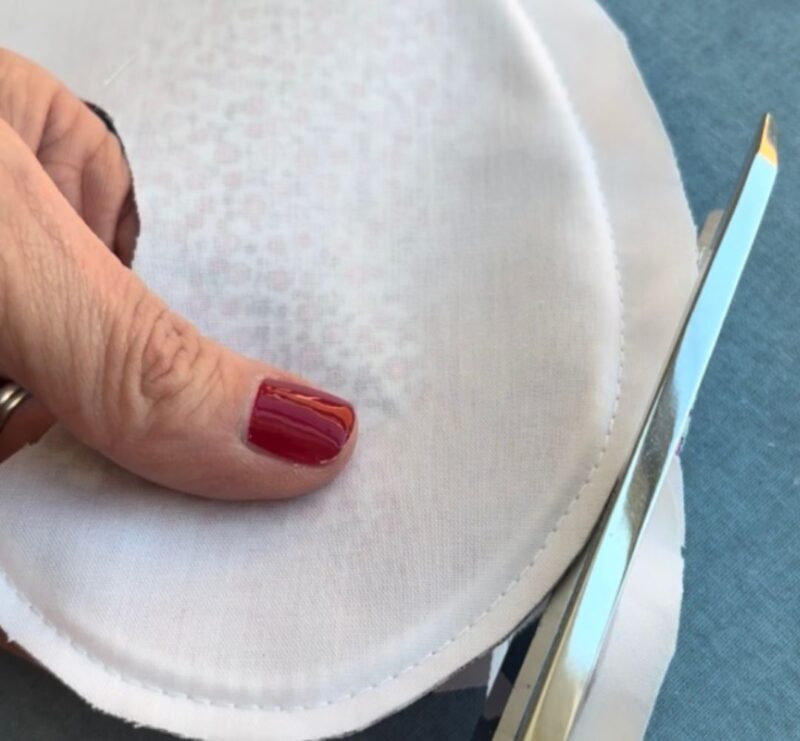
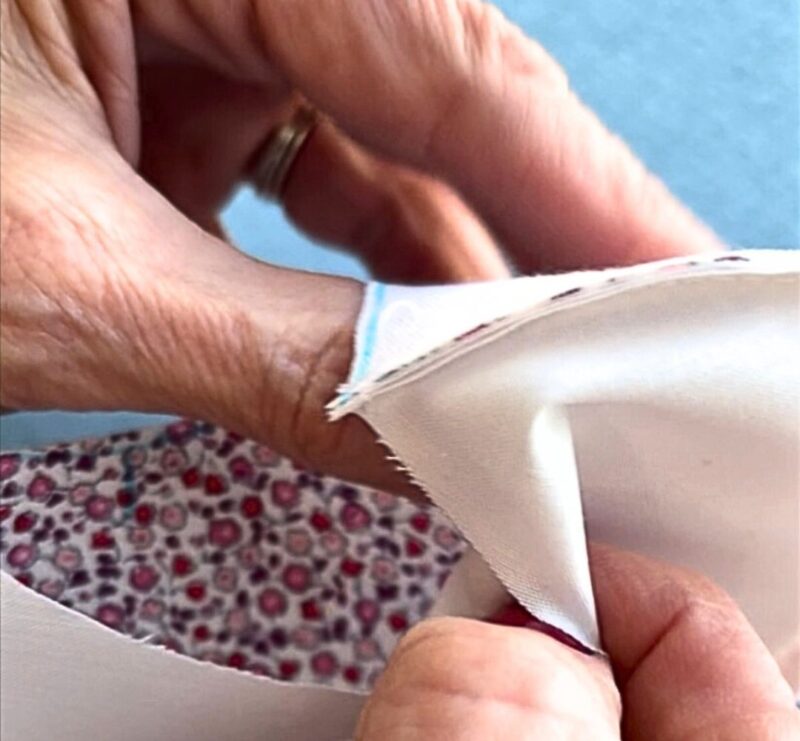
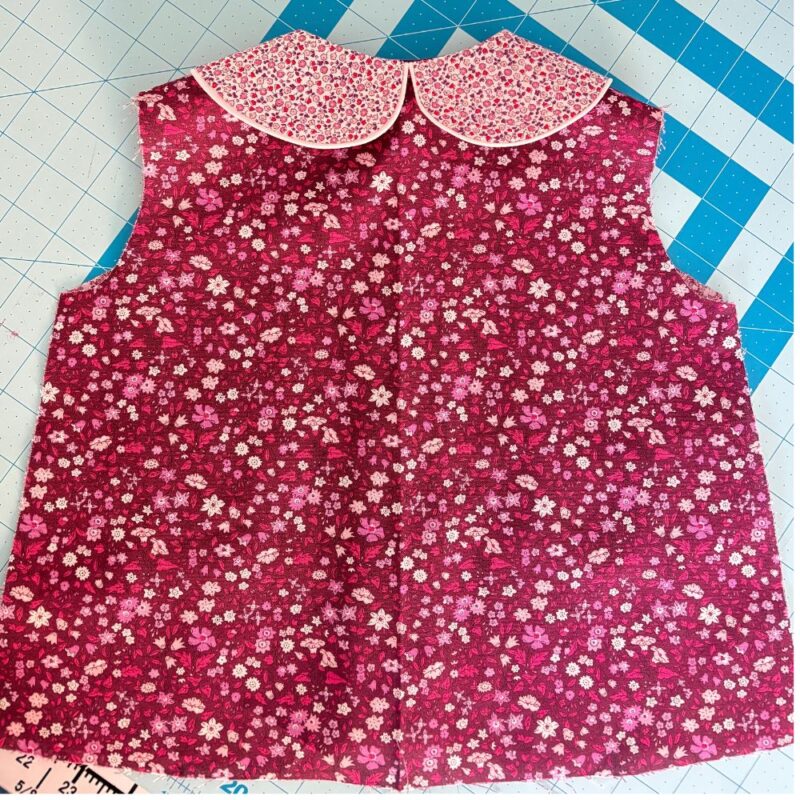
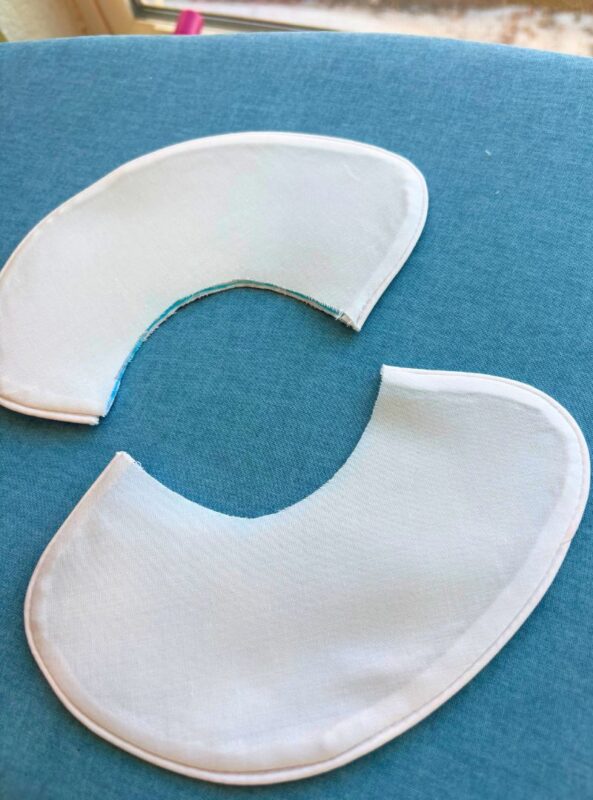
Cut the collars on the drawn lines. Retrim to a scant 1/4″. While my pattern says to remove 1/4″ to 1/2″ of piping from the end, I chose not to as it didn’t make much of an appearance difference. Press and turn each collar right side out. You’re ready to add the collars to the dress top!
Here’s a quick rundown of how to attach a collar to the neckline.
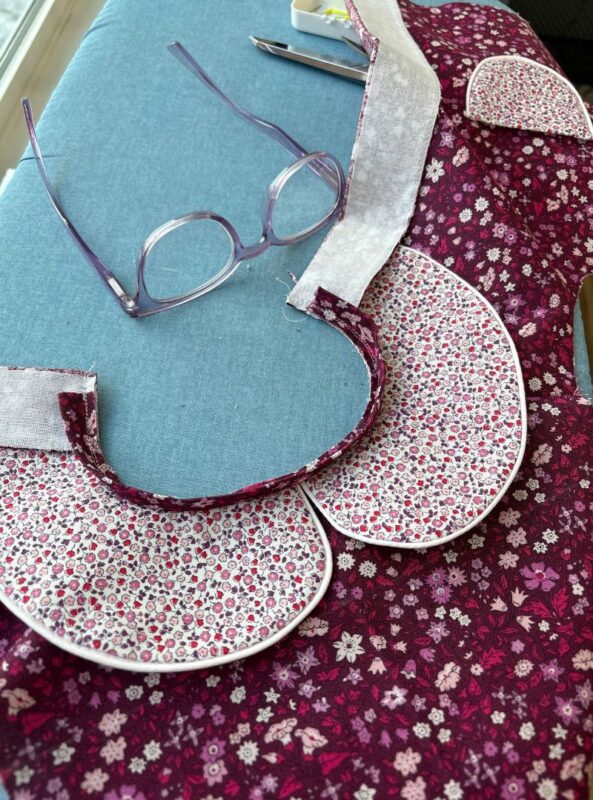
In my pattern, I marked the center back where the collars will meet. The collars were 3/8″ from the self-facing on the front. I stitched the collar in place. You’ll follow all the marks on your pattern to stitch the correct seam allowance.
The facing is then flipped to the front, where a bias strip is added to the neckline, with a seam allowance.
Note: don’t sew the bias strip to the edge of the facing.
Stitch the neck edge with the stated seam allowance in your pattern. Mine was 1/2″, and then I stitched again between that allowance.
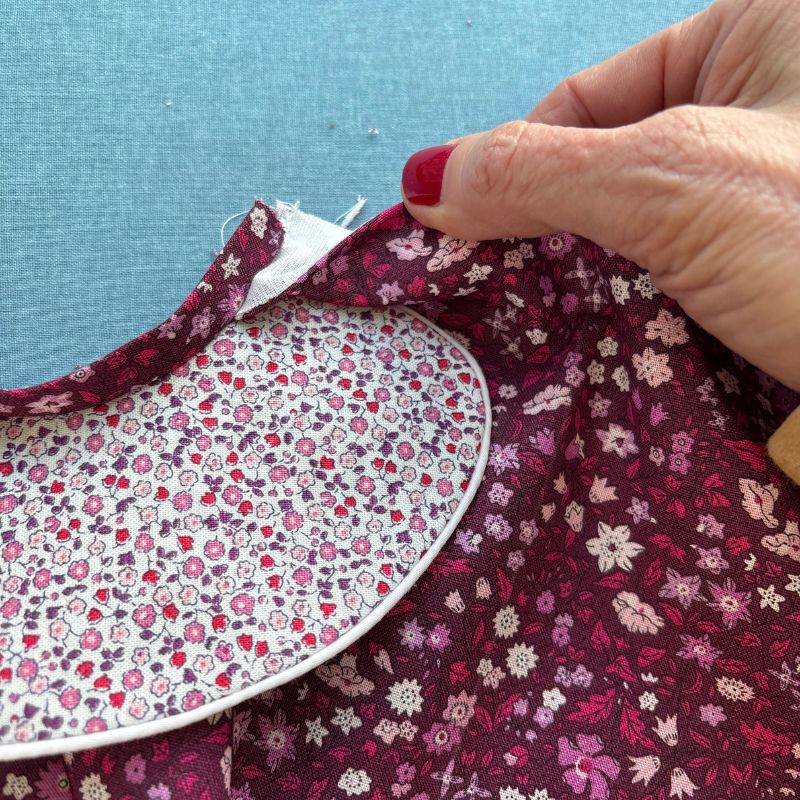
Now turn the facing back, and stitch the bias strip to the inside by hand or machine to create a clean finish. Everything is tucked under and beautiful.
If you have questions, start a topic under sewing in the community! I’m happy to try to help.
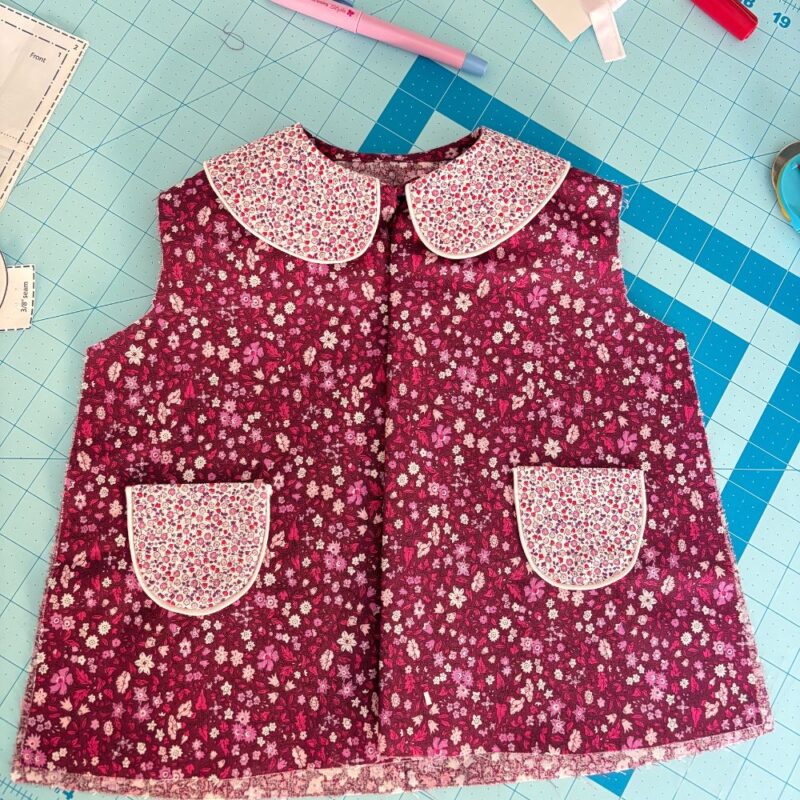
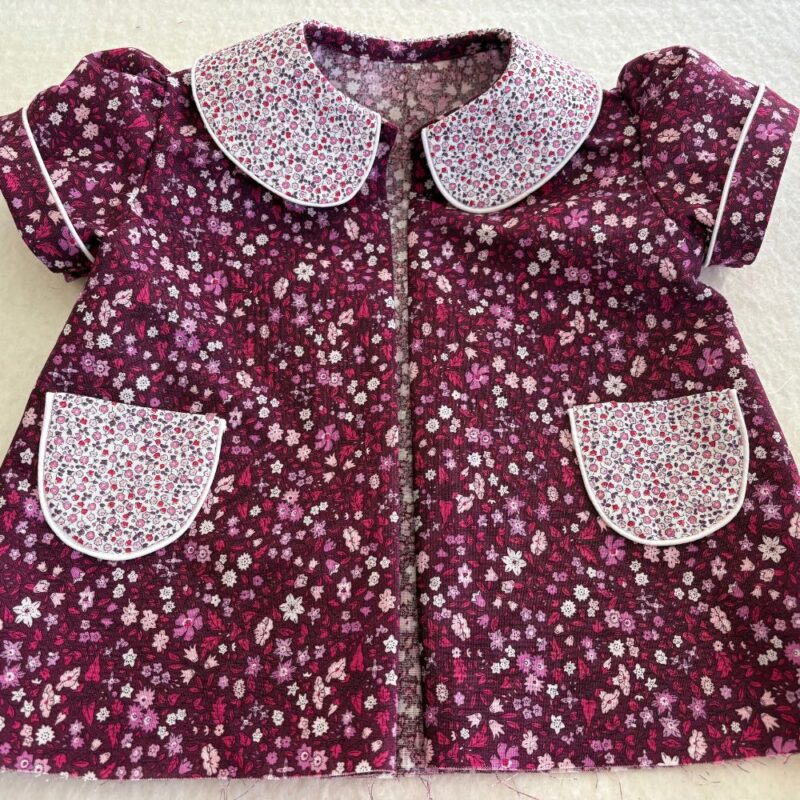
What Fabric We Used for This Dress
For this dress, we used Liberty Fabrics, Ava May Flower Show Bontanicals. The pocket and collar fabric are also Liberty Fabrics, Flower Show Botanical Jewel Suffolk Field.
This is a top and short pattern I hope to teach very soon in our community, from start to finish. Stay tuned!
Happy Sewing,
Theresa

We love publishing our recipes, sharing and teaching sewing, knitting, embroidery and fun crafts. We’re glad you’re here!